One of the most popular features on Send Social Media is the ability to automatically distribute your blog posts to all your social media accounts at once. Our social media management software does this through the use of an RSS auto-poster. This blog post will explain how this can be achieved. Learn how to automatically distribute your blog to Facebook, Twitter, LinkedIn, and more via RSS with Send Social Media:
Step 1: Add your social media accounts
The first thing you’ll want to do is add your social media accounts. You can do this by going to Add/Edit Services where you’ll be able to add your Facebook, Twitter and LinkedIn accounts as well as many others.
Step 2: Create a group
- After linking up your accounts to Send Social Media, go to My Groups and click New Group. Give your group a name and click Create.
- Once your group has been created, click “Add Contacts/Services…”.
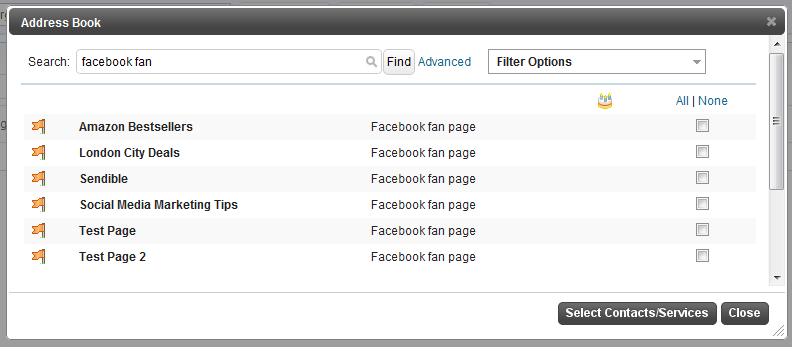
- Select the services you wish to add to the group and click “Select Contacts/Services”. These are the services that will receive the RSS posts. You can select as many services as you like.
-
How to Automatically Distribute Your Blog to Facebook, Twitter, LinkedIn, and more via RSS with Send Social Media
One of the most popular features on Send Social Media is the ability to automatically distribute your blog posts to all your social media accounts at once. Our social media management software does this through the use of an RSS auto-poster. This blog post will explain how this can be achieved. Learn how to automatically distribute your blog to Facebook, Twitter, LinkedIn, and more via RSS with Send Social Media:Step 1: Add your social media accounts
The first thing you’ll want to do is add your social media accounts. You can do this by going to Add/Edit Services where you’ll be able to add your Facebook, Twitter and LinkedIn accounts as well as many others.
Step 2: Create a group
- After linking up your accounts to Send Social Media, go to My Groups and click New Group. Give your group a name and click Create.
- Once your group has been created, click “Add Contacts/Services…”.
- Select the services you wish to add to the group and click “Select Contacts/Services”. These are the services that will receive the RSS posts. You can select as many services as you like.
Step 3: Add the RSS autoposter
Now that you’ve added your social media accounts and created a group of services that will receive RSS posts, you can configure the RSS autoposter.
- Go to Add/Edit Services and select the RSS tab.
- Click “Add” next to the RSS Auto Poster service.
- You will then be taken to the page that allows you to configure your RSS autoposter.
- Complete all the settings, by adding your RSS feed and making sure you select the group you created in Step 2 where it says “Post to the following group”.
- Click Save Settings for your changes to take effect and Send Social Media will start distributing your RSS feed.
Ready to get started? Grab your 7-day free trial or book a free demo.